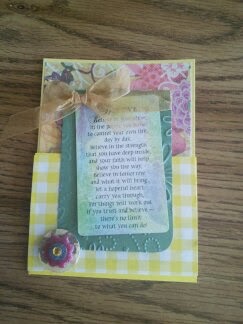
CARD IN A BOX
A
piece of Card Stock cut at 9"
X 5 1/2"
Coordinating pieces of Card Stock measuring
(3) 1 x 3
1/16" leftover
from your 8 ½ x 11 paper.
4
to 7 Pieces of Designer Series Paper or stamped
card
stock measuring 1
7/8" X 2 1/2"
A
piece of DSP or card stock measuring 1
7/8" X 5 1/4"
With
your 9" X 5 1/2" piece of cardstock with the long side at
the top o, score at
2 1/8",
4
1/4", 6 3/8" and 8 ½" turn
it 90 degrees so the short side is along the top and score at 2
3/4"
With
your 3
1/16" X 1" pieces of card stock you want to score 1/2" at each end.
With
your larger piece of cardstock you want to cut up on all of the score
lines on one side. Completely remove the small rectangle to one
side, and notch out a triangle on the opposing small rectangle to
help your box fold together nicely. Burnish all of your score
lines with your Bone Folder AFTER you cut and trim your cardstock.
It will look better when you are finished. Once you have all of
your score lines burnished, place a piece of Sticky Strip along the
small remaining rectangle on the outside of the box. Then fold
it over and meet it with the other side to form the box.
YOU
MAY WANT TO DO SOME DECORATING BEFORE THIS NEXT STEP.
Place Sticky Strip on opposing sides of the cardstock. Take one
flap and gently put it inside the box with the edge of the cardstock
against the back of the box. Gently flatten the box and the two
sides with adhere inside the box perfectly for you. Do the same
with the other piece of cardstock, but towards the front of the box.
Line up the edge of your cardstock with the front and fold it over.
Now you will have your box completely formed and ready to go.
Now
it's time to decorate and embellish your project. Take the
longer strip of DSP or stamped cardstock and put it at the back of
your box. I always look for the seam and make that the back of
my box. This will hold the back upright. Then take your
remaining small pieces of DSP or cardstock and put them on the
flaps of your box. You can also put them along the bottom as
well