Pages

Thursday, August 28, 2014

Here's a simple card...too bad you need a lot of sympathy cards on hand.


Also a superhero card made with the SU owl card.  Cityscape with cricut cartridge

Monday, August 18, 2014

Update for Card in Box


Also the dimensions for long card would be 4 " x 12.  Score at 2, 5 1/2, 7 1/2 and 11".
Turn base and score at 2".  Cut down on score line to the score lines running horizontal.  Cut off the 1" flap on the bottom. Cut two strips for the interior 1 x 4 11/16.  Score 5/8" in on each end. Cut the DSP (2) 1 7/8 x 3 3/8 and (2) 1 7/8 x 1 7/8.


Instead of of two 2 5/8"x 1/2" inserts for your card.  Make one long piece 2" x 5 3/4" and score at 1/2", 2 9/16, ",3 1/16 ", 5 1/8".  If you are wanting more inside pieces make your cardstock 8 1/4" and add the scores at 5 5/8  and 7 3/4".
CARD IN A BOX
A piece of Card Stock cut at 9" X 5 1/2"
Coordinating pieces of Card Stock measuring
(3) 1 x 3 1/16"  leftover from your 8 ½ x 11 paper.
4 to 7 Pieces of Designer Series Paper or stamped
card stock measuring 1 7/8" X 2 1/2" 
A piece of DSP or card stock measuring 1 7/8" X 5 1/4" 
With your 9" X 5 1/2" piece of cardstock with the long side at the top o, score at 2 1/8", 4 1/4", 6 3/8" and 8 ½" turn it 90 degrees so the short side is along the top and score at 2 3/4"
With your 3 1/16" X 1" pieces of card stock you want to score 1/2" at each end.
With your larger piece of cardstock you want to cut up on all of the score lines on one side.  Completely remove the small rectangle to one side, and notch out a triangle on the opposing small rectangle to help your box fold together nicely.  Burnish all of your score lines with your Bone Folder AFTER you cut and trim your cardstock.  It will look better when you are finished.  Once you have all of your score lines burnished, place a piece of Sticky Strip along the small remaining rectangle on the outside of the box.  Then fold it over and meet it with the other side to form the box.  
YOU MAY WANT TO DO SOME DECORATING BEFORE THIS NEXT STEP.


 Place Sticky Strip on opposing sides of the cardstock.  Take one flap and gently put it inside the box with the edge of the cardstock against the back of the box.  Gently flatten the box and the two sides with adhere inside the box perfectly for you.  Do the same with the other piece of cardstock, but towards the front of the box.  Line up the edge of your cardstock with the front and fold it over.  Now you will have your box completely formed and ready to go.
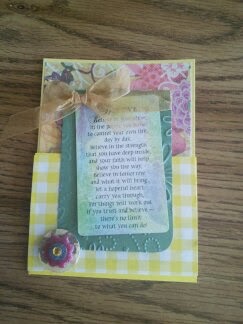
Now it's time to decorate and embellish your project.  Take the longer strip of DSP or stamped cardstock and put it at the back of your box.  I always look for the seam and make that the back of my box.  This will hold the back upright.  Then take your remaining small pieces of DSP or cardstock and put them on the flaps of your box.  You can also put them along the bottom as well
 
Photo paper/lake

Cut photo paper 4”x3'. In small cup but about 1 T water to 1 drop reinker for yellow (sky) and blue (water) Using sponge drag quickly. Allow to dry. Do about 3/5 yellow and 2/5 blue.

Putting post-a-note or card about 1/6' under where blue starts. Sponge a hill on the right with green.
Remove mask and continue to sponge 1-2 colors of lanscape as desired. I put a little reinker on a stamp block and pounced with that. After green you can shade a little orange/red to sky and around the card where the yellow is. (The other part of card you can shade border with dk blue or black)

Using your stamp-a-ma-jig stamp the boat in black. Let dry couple minutes.
Run whole thing through embossing folder, mat on black and attach to card.


Saturday, May 3, 2014

SU card Feeling Sentimental

Add caption


This was a card i recently made...from the internet and .cased from Laura at http://laurascreativemoments.blogspot.com/2013/04/celebrate-celebrate-celebrate.html
made with Stampin Ups Feeling Sentimental.

Thursday, April 17, 2014

Got into making some get well tissue box cards.  I know the pictures are a little iffy but they came out really cute.

Monday, March 10, 2014


I was lucky to find a special on little square Ghirardelli chocolate bars.  Had to make these cute little pouches for my neighbor Kelly's birthday.  CASEd them from several online sources.

 Giradelli Sq. Candy holder

Cut a 4 1/2” scaloped circle (2 1/4” at center)
Score at 3/4” and 1” and 3 1/2”and 3 3/4”

Stamp sentiment on (long center piece) top if desired.

Turn circle making sure it is perpendicular and score at 1 1/4” and 1 1/2” . All folds are valley folds.
Cut as indicated.

Make the folds. Use red line or strong tape to fold over the flap. Decorate front as desired.   
This is called a "joy" fold card and made quite a nice display for a pocket card or ATC.